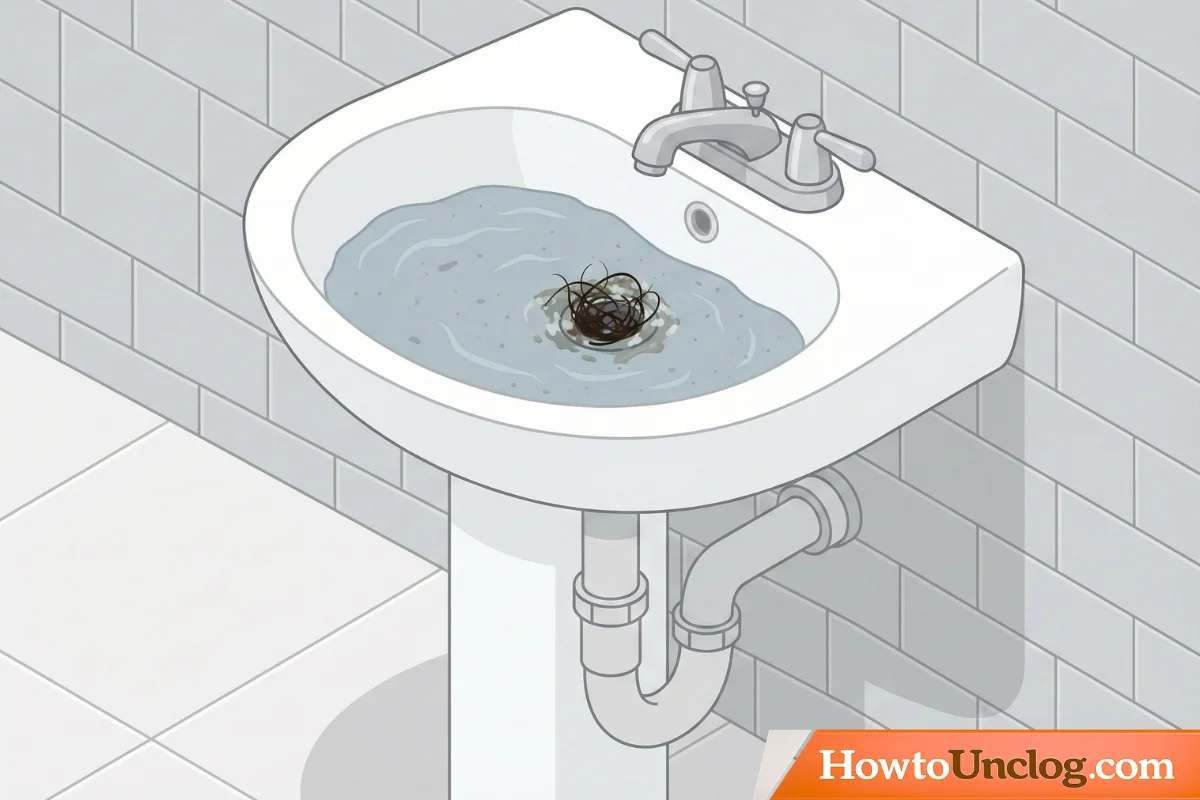
There’s nothing more frustrating than watching water pool in your bathroom sink after brushing your teeth or washing your hands. Standing water isn’t just a minor inconvenience—it’s a sign that something is blocking your drain, and the longer you wait, the worse the problem becomes.
The good news? You don’t need to call an expensive plumber for most clogs. With the right technique and tools, you can clear your drain in under 30 minutes using methods that have proven effective thousands of times over.
Here’s what you’ll learn in this guide:
- Why standing water happens and what causes it
- Five DIY methods that actually work (from easiest to most intensive)
- How to know when a clog needs professional help
- Prevention strategies to keep your sink flowing freely
Whether you’re dealing with a slow drain or complete water backup, we’ve got you covered. Most of these methods cost less than $10 and don’t require special plumbing knowledge. Let’s get that water draining again.
METHOD 1: THE PLUNGER METHOD (Easiest & Fastest)
What You’ll Need
- Bathroom plunger (cup plunger, not a flange plunger)
- Water (for moisture seal)
- Wet towel or cloth
- Optional: bowl or container to catch water
Time Needed: 5-10 minutes Difficulty Level: Easy Cost: Inexpensive Best For: Fresh clogs, hair blockages, partial blockages
Step-by-Step Instructions
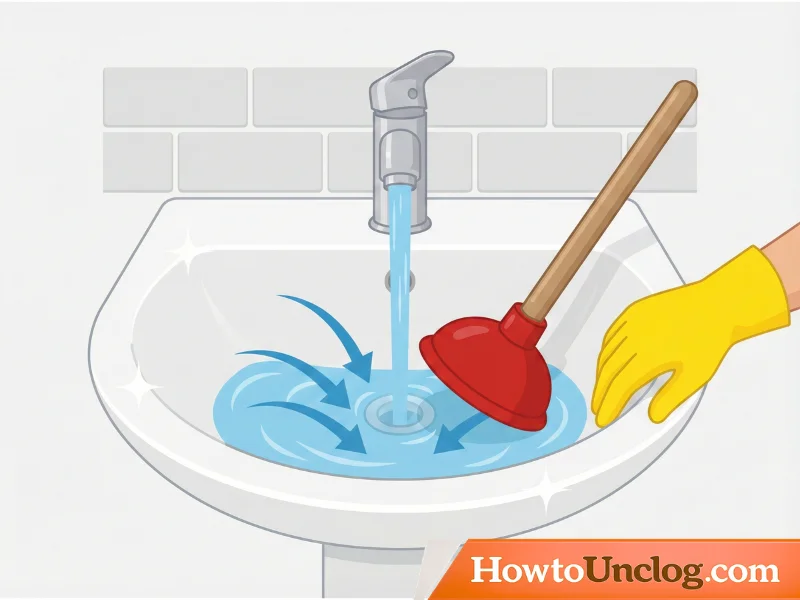
Step 1: Fill the Sink with Water
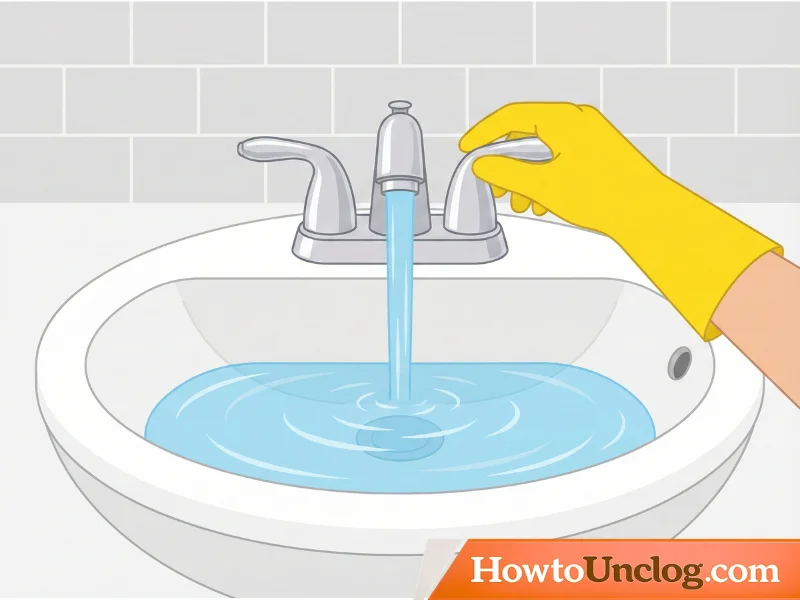
Start with enough water to cover the plunger cup completely. If the standing water is murky or discolored, you may want to add fresh water. The water creates the seal needed for the plunger to work effectively. Don’t drain the sink first—the standing water helps generate pressure.
Step 2: Position the Plunger

Place the plunger cup directly over the drain opening. Make sure it covers the opening completely and sits flush against the sink surface. This creates an airtight seal that’s crucial for generating pressure.
Step 3: Block the Overflow Hole
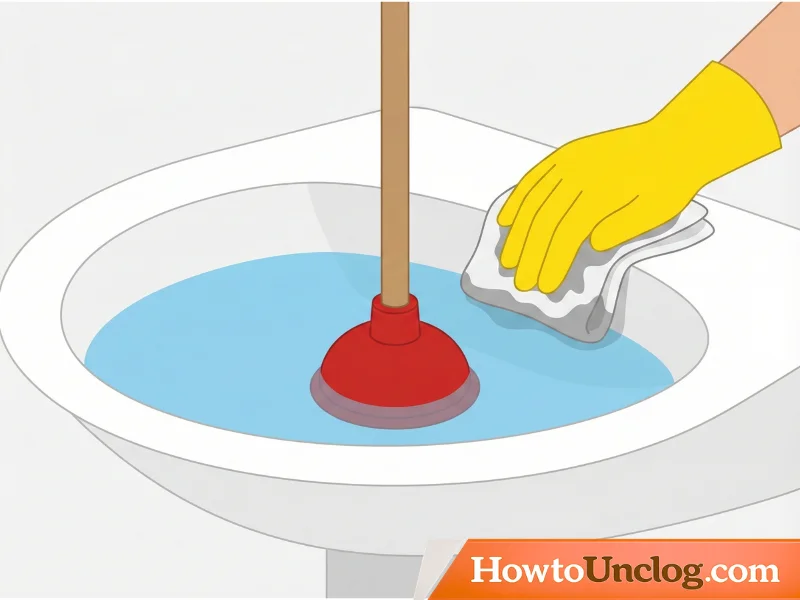
If your sink has an overflow hole (that small opening on the side of the basin), block it with a wet cloth or towel. This prevents air from escaping and ensures all pressure goes toward dislodging the clog.
Step 4: Plunge with Firm, Rapid Motions
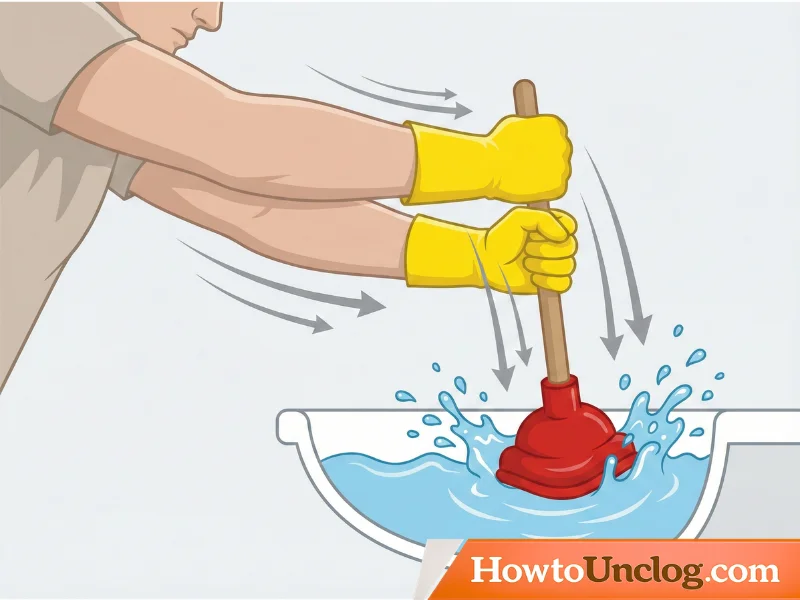
Push down and pull up rapidly in one smooth motion, maintaining the seal with the sink. Perform 15-20 vigorous plunges without breaking the seal. You should hear a suction sound and feel the plunger creating pressure. Use your full arm strength—this needs to be forceful.
Step 5: Check Drainage
Lift the plunger and let the water drain. If it drains quickly and completely, the clog is cleared. If water is still standing, repeat the plunging process 2-3 more times. Sometimes stubborn clogs need multiple attempts.
When This Works Best:
- Fresh clogs caused by hair and soap buildup
- Partial blockages (slow draining sinks)
- Clogs within the first 12 inches of the drain pipe
- When you need a quick fix without chemicals
Pro Tips & Warnings:
- Don’t use excessive force on delicate sinks. Aggressive plunging can crack older ceramic basins or damage vintage fixtures. Use firm but controlled pressure.
- The cup must seal completely. If you see water squirting around the plunger edges, your seal is broken and the method won’t work. Adjust the plunger position.
- Keep the plunger wet. A dry plunger won’t create the proper seal. Dip it in water frequently between plunges.
- Wear protective gloves. You’re working with drain water that may contain bacteria and debris. Disposable latex or nitrile gloves are ideal.
METHOD 2: THE BAKING SODA & VINEGAR METHOD (Natural & Chemical-Free)
What You’ll Need
- Baking soda (1 cup)
- White vinegar (2 cups)
- Boiling water (1 quart)
- Kettle or pot
- Small bowl or measuring cup
- Plug or stopper for sink drain
- Rubber gloves
Time Needed: 30-45 minutes (mostly waiting) Difficulty Level: Very Easy Cost: Less than $5 Best For: Mild to moderate clogs, preventative maintenance, eco-conscious homeowners
Step-by-Step Instructions
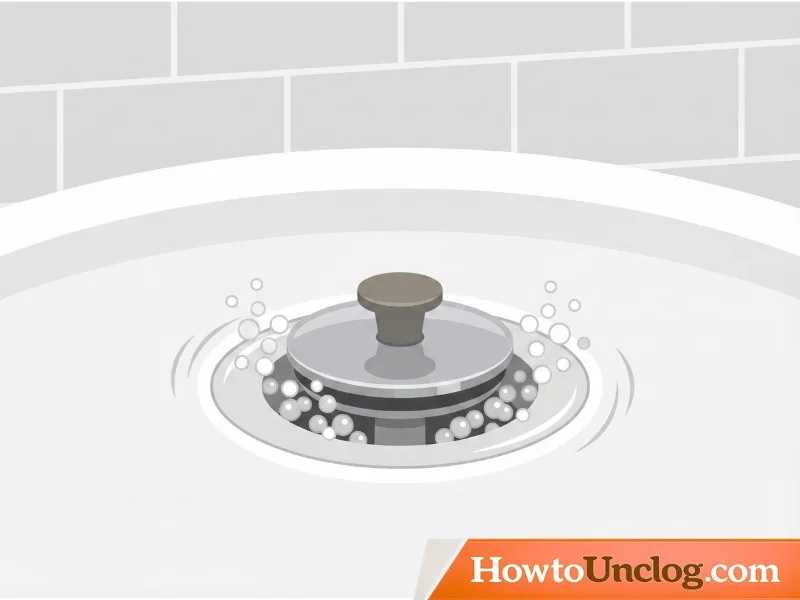
Step 1: Remove the Drain Stopper
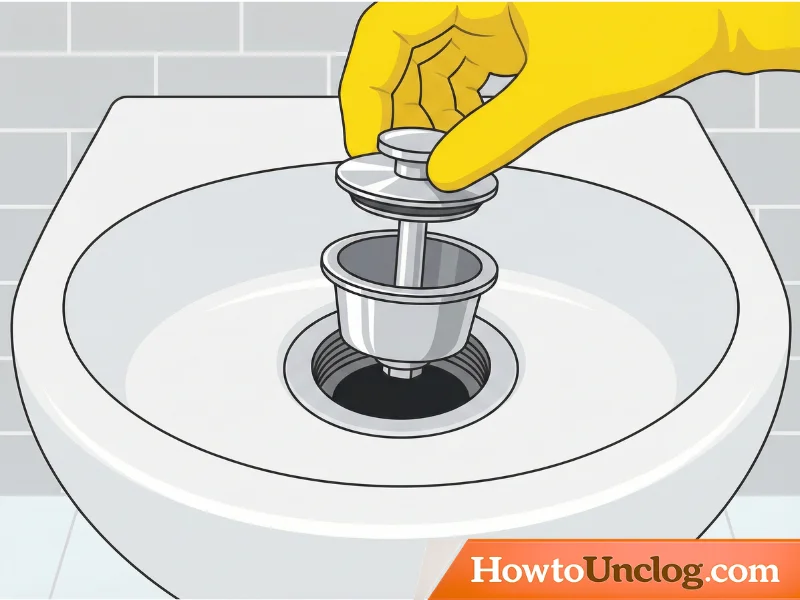
Pop out the drain stopper or plug. Most bathroom sinks have a pop-up stopper that lifts straight up or twists counterclockwise. If you have a traditional plug, simply remove it. Set it aside where you won’t lose it.
Step 2: Pour Baking Soda Down the Drain
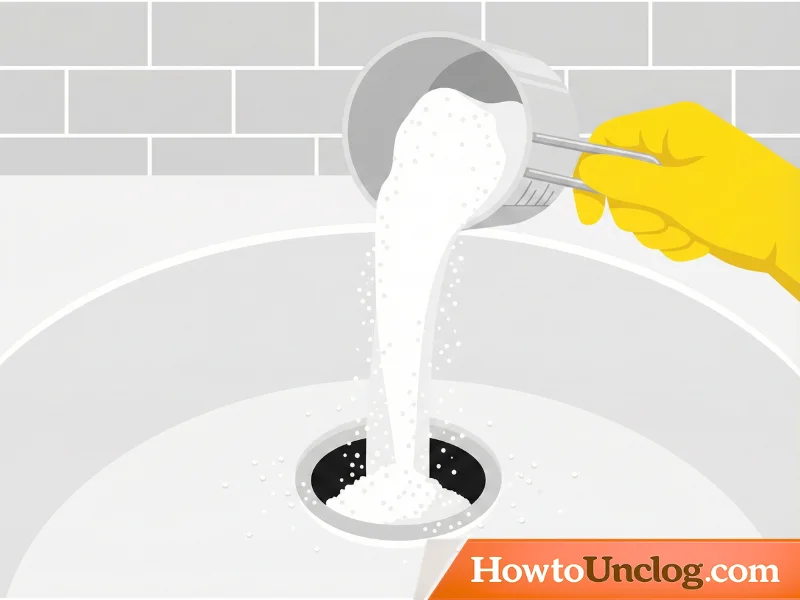
Pour one cup of baking soda directly down the drain. Use a funnel if you have one to ensure it all goes down rather than scattering on the sink surface. The baking soda will fall into the pipe and sit on top of the clog.
Step 3: Follow with Hot Vinegar
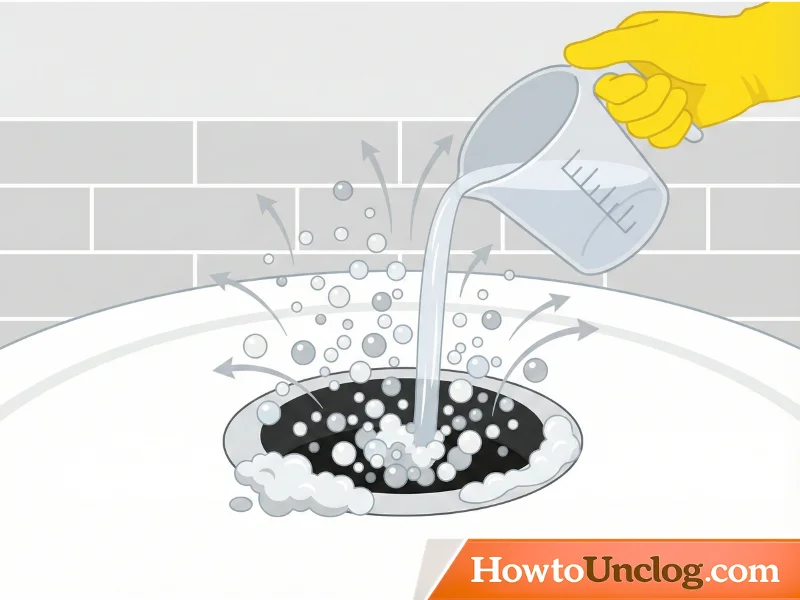
Quickly pour 2 cups of white vinegar down the drain. It will immediately react with the baking soda, creating a fizzing and bubbling reaction. This chemical action helps break up the clog and push debris through the pipe. Don’t be alarmed by the vigorous reaction—this is exactly what you want.
Step 4: Plug the Drain and Wait
Immediately plug the drain with the stopper or a wet cloth to contain the reaction. The pressure created by the bubbling helps dislodge stubborn debris. Leave it plugged for 30 minutes. You may hear gurgling sounds—that’s the reaction working through the pipe.
Step 5: Flush with Boiling Water
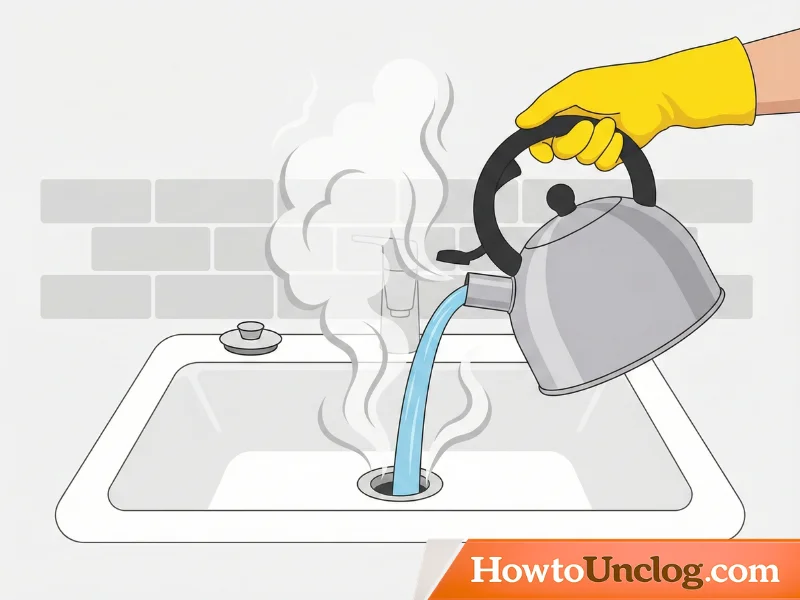
After 30 minutes, remove the stopper and carefully pour a quart of boiling water down the drain. The hot water dissolves loosened debris and flushes it through the system. Boiling water is especially effective at melting soap scum and grease buildup.
When This Works Best:
- Mild to moderate clogs (slow to moderately slow drainage)
- Routine maintenance and preventative care
- Homes where harsh chemicals aren’t desired
- Clogs caused by soap, hair, and organic buildup
Pro Tips & Warnings:
- Safety first with boiling water. Boiling water can cause severe burns. Pour slowly and carefully. Wear closed-toe shoes and keep children away.
- Use white vinegar, not apple cider. White vinegar has higher acidity (5%) and works more effectively. Apple cider vinegar is less effective and stains.
- Repeat monthly for prevention. Use this method once a month on all drains to prevent buildup and maintain flow.
- This won’t work on complete blockages. If water isn’t draining at all, try the plunger method first before attempting baking soda and vinegar.
METHOD 3: THE DRAIN SNAKE METHOD (For Deeper Blockages)
What You’ll Need
- Handheld drain snake or plumbing auger ($8-15)
- Bucket or container
- Wet towels (to catch water/debris)
- Rubber gloves
- Flashlight (optional, helpful for visibility)
- Needle-nose pliers (optional)
Time Needed: 15-20 minutes Difficulty Level: Moderate Cost: $8-30 for a drain snake Best For: Hair clogs deeper in the pipe, clogs that resist other methods, complete blockages
Step-by-Step Instructions
Step 1: Remove the Drain Stopper and Pull Up Excessi Standing Water
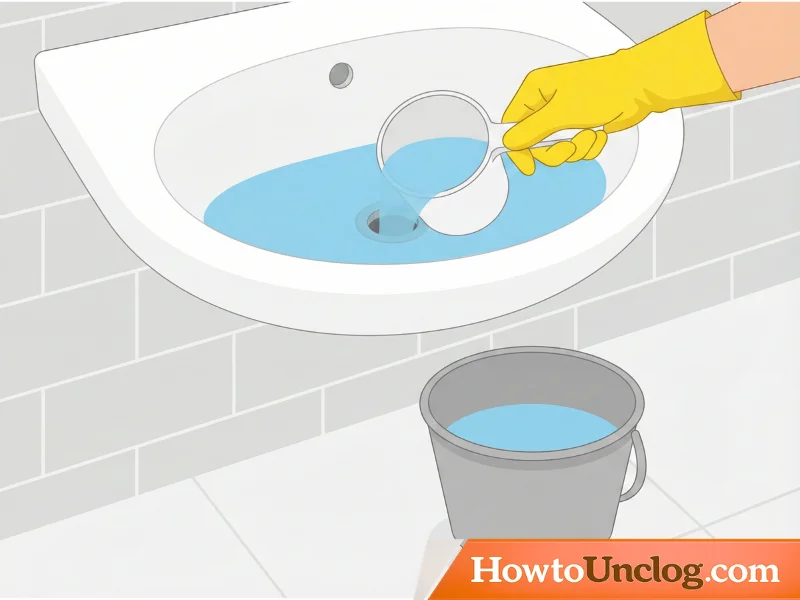
Remove the drain stopper first. Then, if there’s significant standing water, scoop some out into a bucket. You don’t need the sink completely dry, but reducing the water level makes it easier to see what you’re doing and prevents water from splashing when you insert the snake.
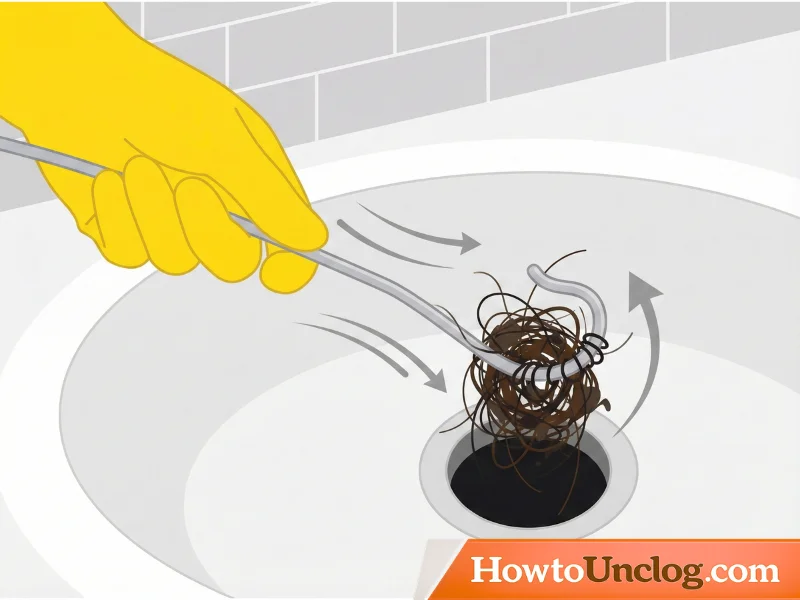
Step 2: Insert the Drain Snake Into the Drain Opening

Gently feed the drain snake into the opening. Start slowly—don’t force it. The flexible cable should slide down relatively easily at first. Feed several feet of cable into the drain until you feel resistance, which indicates you’ve hit the clog or a bend in the pipe.
Step 3: Crank the Handle to Catch or Break the Clog
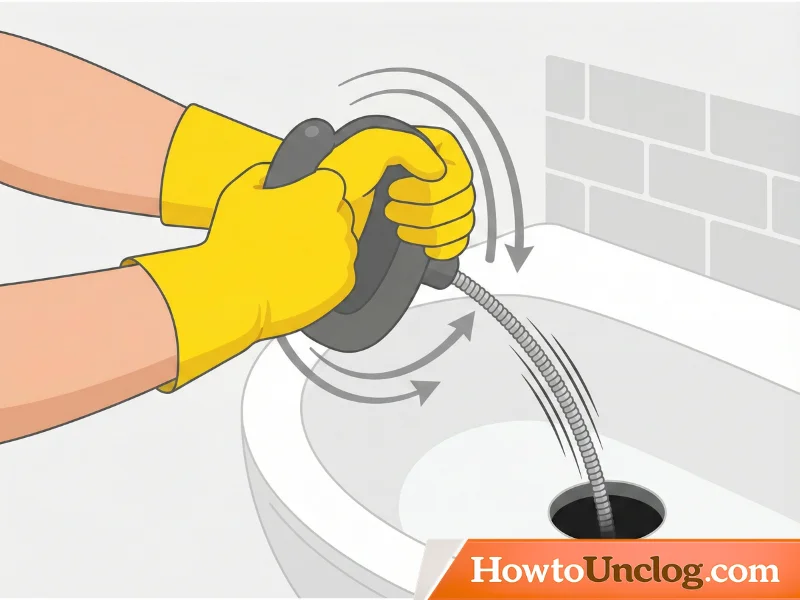
Once you’ve fed enough cable down and feel resistance, rotate the handle clockwise (crank it). This rotation does two things: it can hook into debris and hair to pull it out, or it can break apart stubborn blockages. Crank steadily for 10-15 seconds, then pull back slightly and crank again.
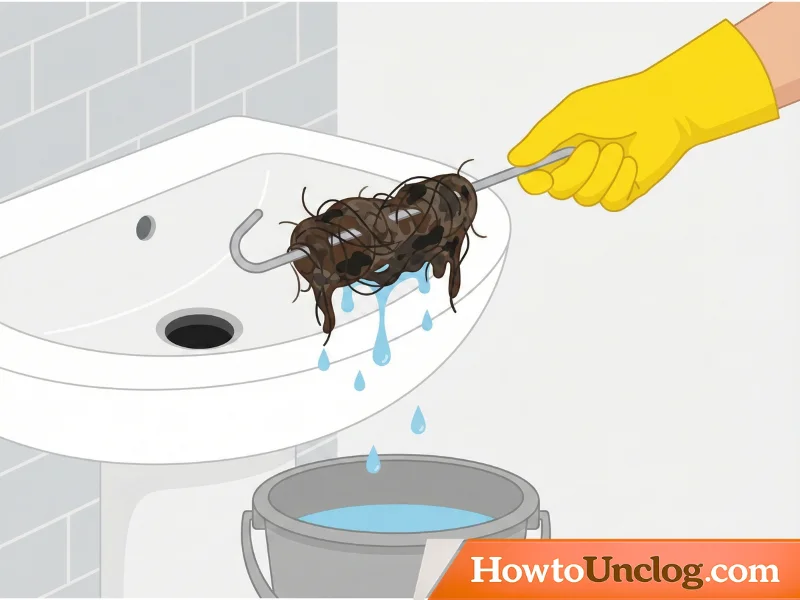
Step 4: Pull the Snake Back Out
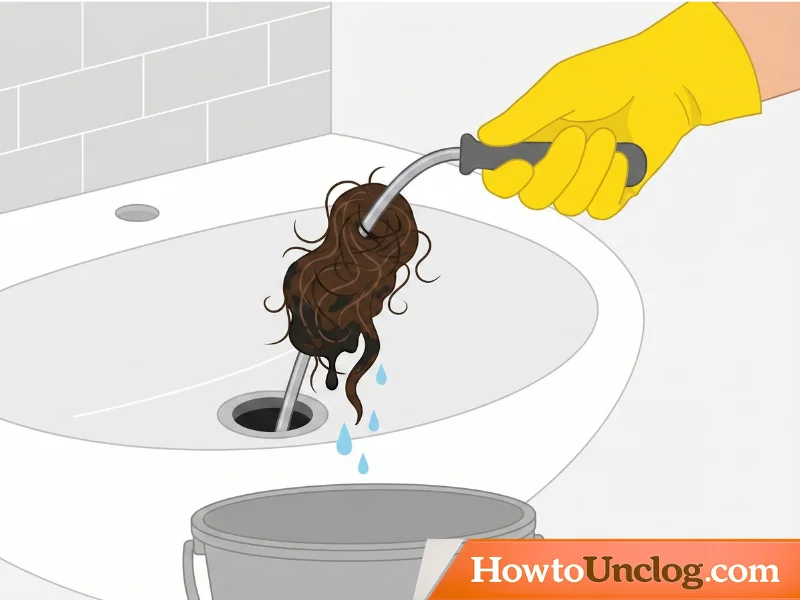
Pull the snake straight back up and out of the drain. You’ll often see hair and debris wrapped around the cable—this is what was blocking your drain. Have a bucket nearby to catch dripping water and dispose of the debris.
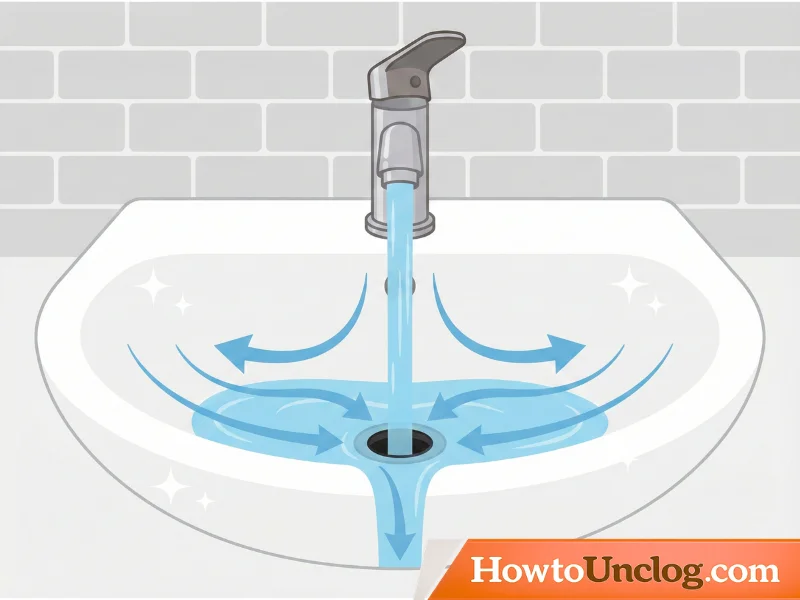
Step 5: Run Water to Test the Drain
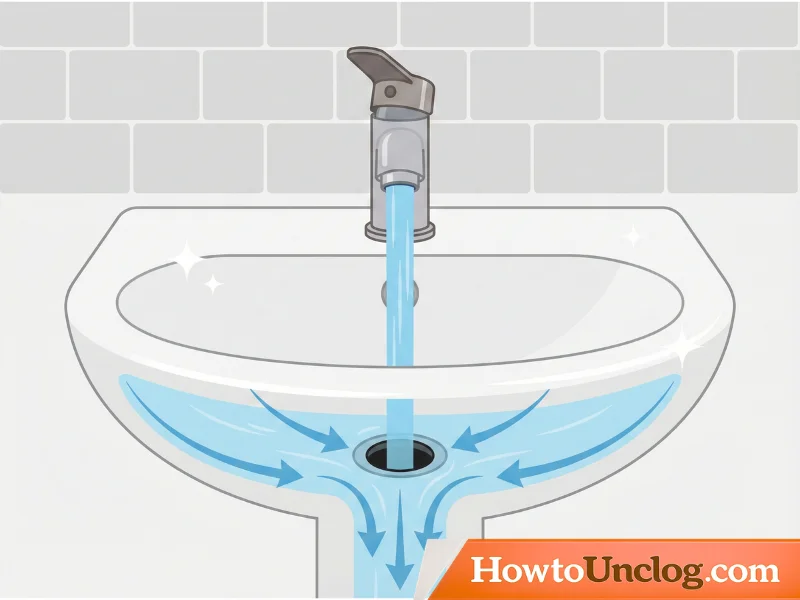
Turn on the faucet and let water run down the drain. If it drains quickly and completely, the clog is cleared. If it’s still slow or backing up, repeat the process. You may need to feed the snake deeper or perform several passes to completely clear stubborn clogs.
When This Works Best:
- Clogs deeper in the drain pipe (beyond the trap)
- Hair clogs specifically (the snake catches and extracts hair effectively)
- Complete blockages where water isn’t draining at all
- Clogs resistant to plunging or chemical methods
Pro Tips & Warnings:
- Don’t force the snake. If you meet resistance and the cable won’t feed, you’ve likely hit a bend or clean section. Back up and try again. Forcing can damage the pipe.
- Protect your hands and eyes. The debris that comes out can splash. Wear gloves and safety glasses if available. Drain water may contain bacteria.
- Wear old clothes. Drain water and debris can stain. You don’t want to ruin nice clothes.
- Clean the snake after use. Run water over the cable and wipe it clean before storing to prevent odors and rust.
METHOD 4: THE WIRE HOOK METHOD (Chemical-Free, DIY Tool)
What You’ll Need
- Wire coat hanger or straightened wire
- Needle-nose pliers
- Small bucket
- Rubber gloves
- Paper towels
- Flashlight (helpful)
Time Needed: 10-15 minutes Difficulty Level: Easy to Moderate Cost: Free to $2 (if you don’t have wire) Best For: Hair clogs in the drain opening, surface blockages, quick fixes
Step-by-Step Instructions
Step 1: Fashion a Hook from Wire
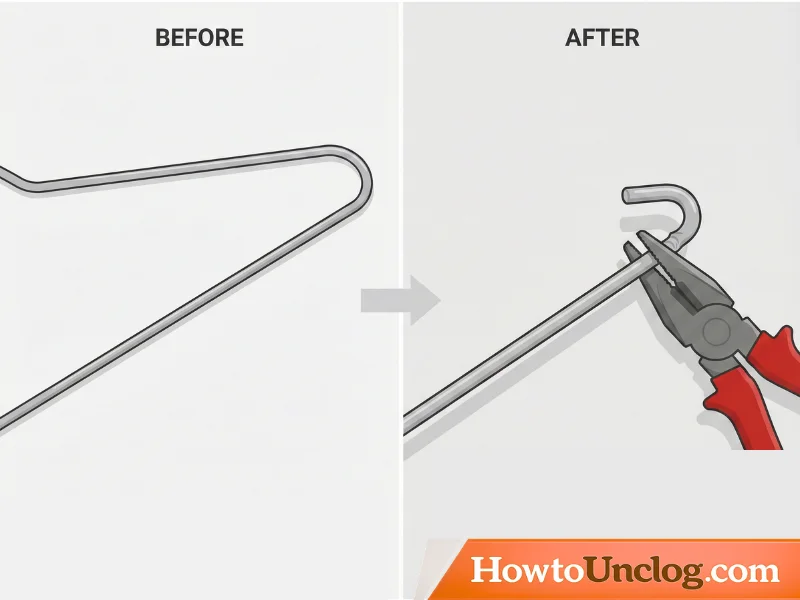
Take a wire coat hanger and use needle-nose pliers to bend one end into a small hook shape. The hook should be roughly 1-2 inches long and curved enough to catch hair but not so sharp that it damages the drain. Bend it slowly and carefully to avoid snapping the wire.
Step 2: Remove the Drain Stopper
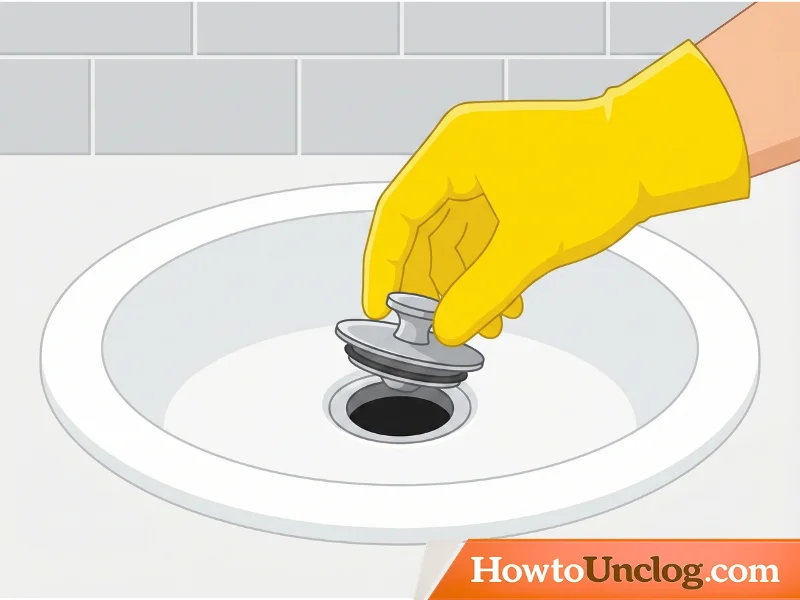
Pop out the drain stopper and set it aside. Look down into the drain with a flashlight if available. You’ll often see a clump of hair and debris right at the top of the opening. This surface-level debris is exactly what this method targets.
Step 3: Insert the Wire Hook and Fish Out Debris
Gently insert the hooked end of the wire into the drain opening. Slowly rotate and maneuver it to catch the debris and hair visible at the drain entrance. Once you feel it’s caught, gently pull upward. Don’t jerk or yank—slow and steady extraction prevents the debris from breaking apart and pushing back down.
Step 4: Remove Caught Debris
Pull the debris off the hook into a trash can or bucket. You may need to repeat this process multiple times—insert the hook, catch debris, pull it out, remove it, and repeat. With each extraction, you’ll pull out more of the clog.
Step 5: Rinse and Verify Drainage
Run water down the drain to verify it’s flowing freely. If drainage is now quick, you’ve successfully cleared the clog. If it’s still slow, you may need to repeat the wire hook extraction a few more times or try another method.
When This Works Best:
- Hair clumps visible right at the drain opening
- Quick fixes before trying more intensive methods
- Preventative maintenance (do this weekly to prevent buildup)
- Clogs accessible from the surface
Pro Tips & Warnings:
- Never force the hook into the drain. If you can’t feed it easily, stop. Forcing can bend the drain fitting or get the wire stuck.
- Watch for the curved section. Most drains have a curved p-trap right below the opening. The hook works best in the straight section above it.
- This is preventative. Do this weekly or biweekly on all bathroom drains to catch hair before it becomes a major clog.
- Dispose of debris properly. Never put the debris in the toilet; it will just cause problems there. Throw it in the trash.
METHOD 5: THE PLUMBING TRAP WRENCH METHOD (For Stubborn Clogs)
What You’ll Need
- Adjustable wrench or pipe wrench ($10-20)
- Bucket and towels
- Rubber gloves
- Small bowl or cup
- Flashlight
- Pipe thread seal tape (optional, for reassembly)
Time Needed: 20-30 minutes Difficulty Level: Moderate to Advanced Cost: $10-50 Best For: Complete blockages, clogs deep in the p-trap, persistent clogs
Step-by-Step Instructions
Step 1: Position a Bucket Under the P-Trap
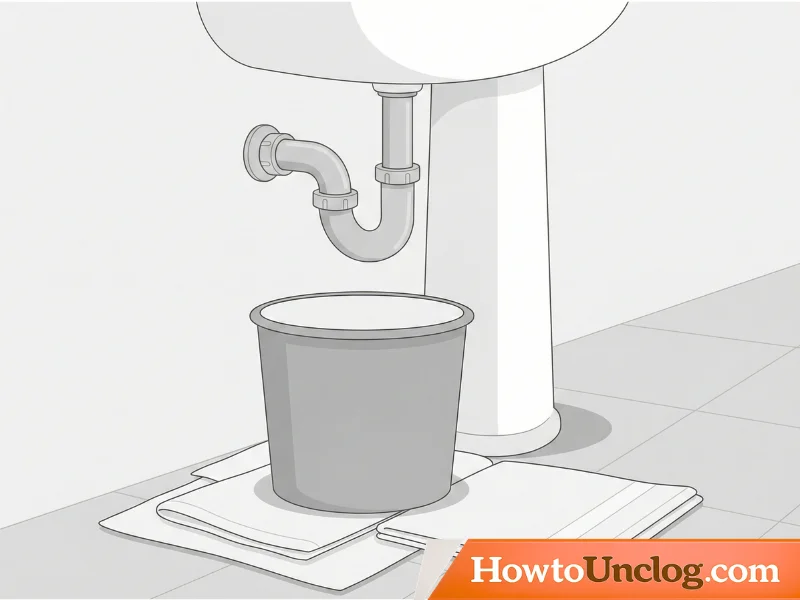
Place a bucket under the curved P-trap section of the drain pipe. This is the U-shaped section under the sink. Water and debris will spill out when you loosen the connection, so be prepared. Lay towels around the bucket to catch spills.
Step 2: Locate and Loosen the Slip Nut
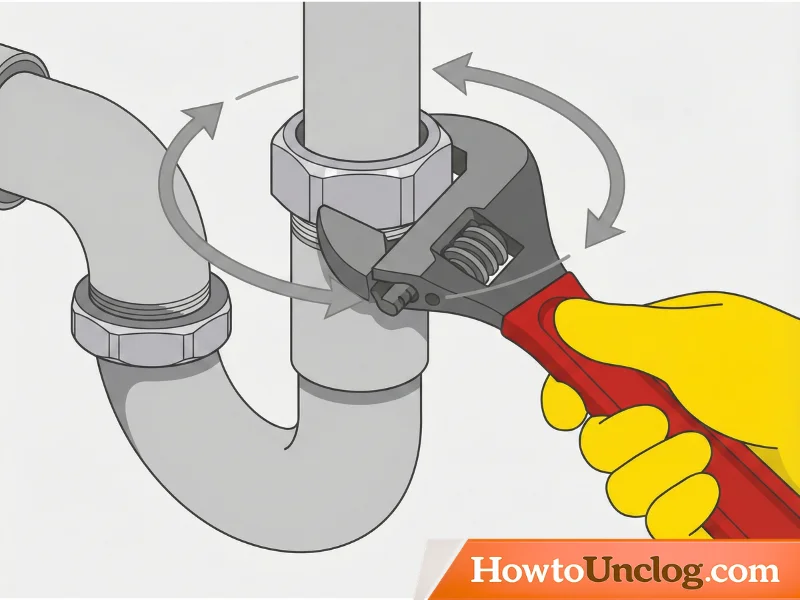
The P-trap connects to the drain line with a large hex nut called a slip nut. This is usually located on the upper connection point of the trap. Using an adjustable wrench, turn the slip nut counterclockwise to loosen it. Go slowly—you’ll feel it release as the seal breaks. Water may start dripping immediately.
Step 3: Unscrew and Remove the P-Trap Section
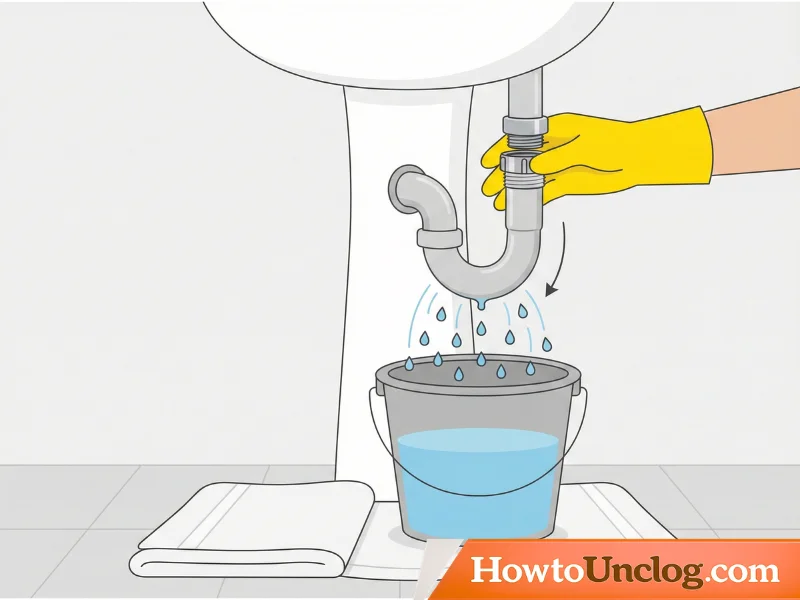
Once the slip nut is loose enough, finish unscrewing it by hand. Carefully pull the P-trap section straight down and away from the drain connection. Water will pour out into the bucket. This is normal and expected. Avoid spilling on the cabinet or floor by keeping the bucket positioned correctly.
Step 4: Clear the Blockage from the Trap Section
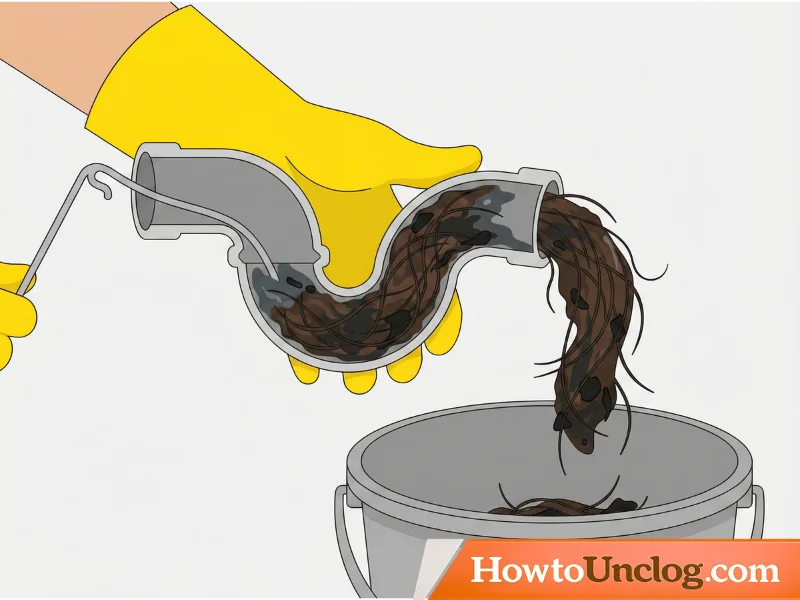
Hold the P-trap section over the bucket and look inside with a flashlight. You’ll often see exactly where the blockage is—a dark clump of hair, soap, and debris. Use a wire, straightened coat hanger, or stick to push or pull the blockage out into the bucket. This direct access is why this method is so effective for stubborn clogs.
Step 5: Rinse the Trap and Reconnect
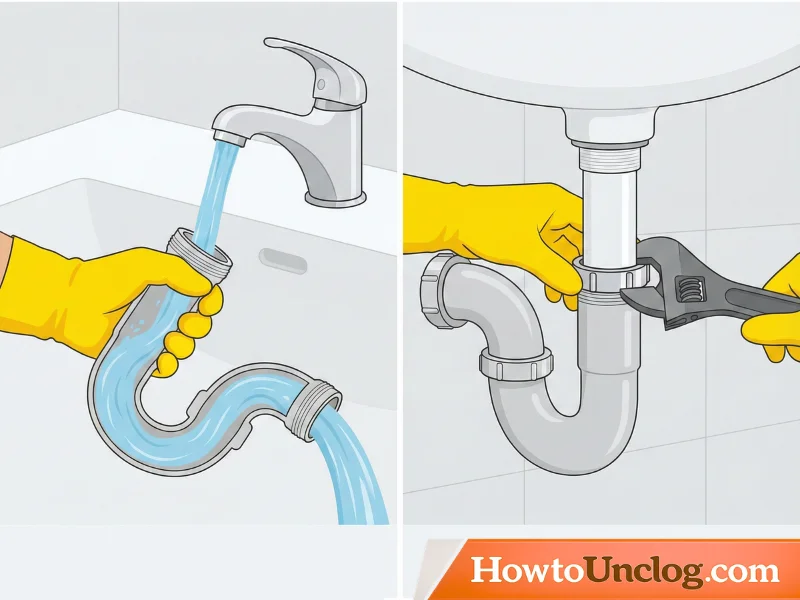
Rinse the P-trap section thoroughly under running water to remove all debris. Then reconnect it by sliding it back under the sink and hand-tightening the slip nut. Use the wrench to tighten it further, but don’t over-tighten—just snug enough that it doesn’t leak.
When This Works Best:
- Complete blockages that won’t budge with other methods
- Clogs that have accumulated over months or years
- When you can see exactly where the clog is located
- Stubborn debris packed into the p-trap
Pro Tips & Warnings:
- It’s going to be wet and messy. Drain water often contains bacteria and debris. Wear gloves and be prepared for splashes. Protect your eyes with safety glasses if possible.
- Don’t over-tighten the slip nut. You only need it tight enough to prevent leaks. Over-tightening can crack the nut or damage the fitting, creating bigger problems.
- Check for leaks after reassembly. Turn on the faucet and let water run. Check under the sink for drips around the reconnected joints. If it leaks, tighten slightly more.
- Mark your wrench position. Before loosening, you can mark where the wrench sits so you know how tight it was originally. This helps when reassembling.
CRITICAL SECTION: When to Call a Professional Plumber
Not all clogs can be fixed with DIY methods. Knowing when to call a professional prevents further damage and saves time.
Call a professional plumber immediately if:
- The clog affects multiple drains. If your toilet, shower, and sink are all backing up, the blockage is in the main sewer line, not the sink trap. This requires professional equipment.
- You’ve tried multiple methods and nothing works. Persistent clogs after trying all five methods indicate a deeper structural issue.
- Water is backing up into other fixtures. If you see water coming up in the toilet when you use the sink, you have a serious line problem.
- There’s a foul smell even after clearing the visible clog. This suggests bacterial growth or damage inside the pipe.
- You see signs of structural damage. Cracks in the pipe, water stains on the ceiling below, or soft spots under the sink indicate the pipes themselves are failing.
- You’re not comfortable working under the sink. Professional plumbers have tools and training for tricky situations. It’s worth the cost for peace of mind.
Estimated professional plumber costs:
- Service call: $75-150
- Simple clog removal: $150-300
- Complex clog removal: $300-600+
- Pipe replacement: $1,000+
Prevention Tips: Stop Clogs Before They Start
The best clog is one that never happens. These prevention strategies keep your drains flowing freely:
Weekly Maintenance:
- Do the wire hook method weekly. Spend 2 minutes pulling surface hair and debris from your drain before it accumulates. This is the single best prevention method.
- Use a drain stopper or hair catcher. These inexpensive mesh covers ($3-5) catch hair before it enters the pipe. Empty them after each use.
- Wipe your toothbrush. Toothpaste residue accumulates. Rinse your brush thoroughly before putting it away.
Monthly Maintenance:
- Run the baking soda and vinegar treatment. Once monthly on all drains prevents buildup and keeps pipes fresh.
- Flush with boiling water. Pour a kettle of boiling water down each drain monthly to dissolve soap and grease.
- Don’t pour anything down the sink except water. This includes makeup, medications, cooking oils, and grease.
Lifestyle Changes:
- Brush hair before showering. Remove loose hair from your head before entering the shower to reduce what goes down the drain.
- Don’t rinse food down the sink. Use a strainer in the kitchen sink and wipe plates into the trash. Small food particles accumulate into clogs.
- Be mindful of soap buildup. Use less soap or switch to liquid soap, which causes less buildup than bar soap residue.
Frequently Asked Questions
Final Thoughts & Call-to-Action
Standing water in your bathroom sink is frustrating, but it’s absolutely fixable. With the five methods in this guide, you have proven solutions for every level of clog—from simple surface blockages to deep, stubborn clogs packed into the p-trap.
Start with the easiest method (the plunger) and work your way through. Most clogs clear with Method 1 or 2. Only move to more advanced methods if needed.
Remember these key points:
- Act fast. The longer a clog sits, the more material accumulates and the harder it is to clear
- Prevent future clogs with weekly wire hook maintenance and monthly baking soda treatments
- Know when to call a professional. Some problems require professional equipment and expertise
- Protect yourself. Wear gloves, be careful with boiling water, and keep children away
Your sink can be flowing freely in 30 minutes or less. Don’t wait—grab your plunger or wire hanger and get started. Thousands of homeowners have successfully cleared their drains using these exact methods, and you can too.
Have you successfully unclogged a drain using one of these methods? Share your experience in the comments below. And don’t forget to bookmark this guide for future reference—you’ll want easy access to these methods when you need them.